How to make a Git Pull Request
The only requirement of membership in the Programming Club, besides following our conduct rules, is that every member must make a Pull Request on GitHub on a club repository once per semester.
A Pull request is an action performed on GitHub.com where someone requests that changes they made to a copy of a project be added to the original project.
Making a pull request is a little complicated, especially the first time. It involves a mixture of command line actions and interacting with the user interface on GitHub.com.
This guide will instruct on how to make a simple, content-related pull request on a Programming Club Repository.
Once you have Git installed and have a GitHub account, the process is this:
fork - clone - edit - push - pull request
Table of Contents
- Download Git and Create a GitHub Account
- Add Git to the Path
- Configure Git by adding Username and Email
- Fork (copy) the Repository on GitHub
- Clone (copy locally) your Fork
- Make your Edits
- Add (stage) the Changes
- Commit (save) the Changes
- Push (upload) the Changes
- Open a pull request (request to merge)
1 - Download Git and Create a GitHub Account
Git is available at https://git-scm.com/downloads. Download the version for your system. This guide assumes you have Windows 10.
What Git is:
- Git is a separate program from GitHub and can also be used with other platforms, like BitBucket.
- Git lets you save and load changes to a bunch of files at once.
- It’s a lot like saving a whole directory.
- The directory where Git is activated is called the “repository”
- Saving is called “commit”ing.
- Repositories can be reverted to past commits.
- Repositories can be uploaded and synced to GitHub so multiple people can work on them.
You can create a GitHub Account by navigating to GitHub.com in any browser and following the instructions there.
2 - Add Git to the Path
Note: This may be set up by default when you install Git. You can test it by typing ‘git help’ on the command line.
Go to the directory where you installed Git and find the cmd directory. For example:
C:\Program Files\Git\cmd
In that directory is a file (on Windows) called Git.exe. You need to add this directory to your “Path” so that you can access Git.exe on the command line from any place on the system.
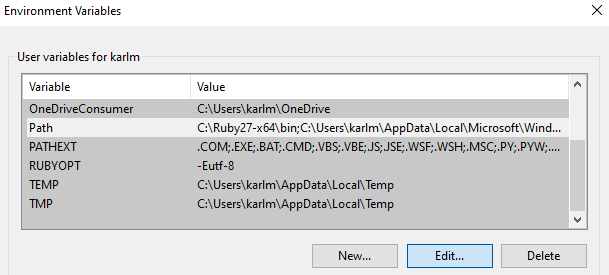
To add it to your path, open Window’s environment variables manager. Press the windows key and type ‘environment variables’

Press the Edit button to edit the Path Variable.
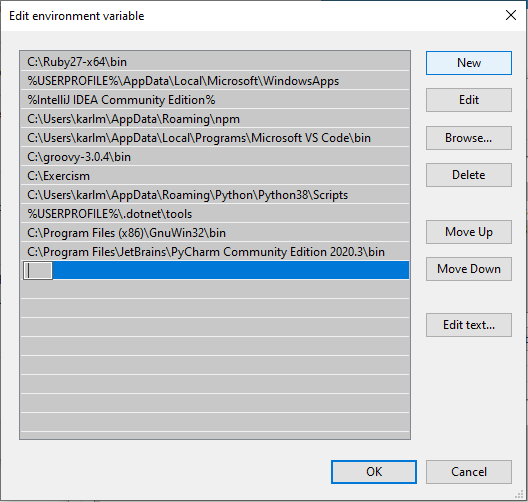
In the Edit window for the Path variable, press the New button to add a new location to the path.
Type C:\Program Files\Git\cmd (or whatever directory Git\cmd was installed to) and press Enter.
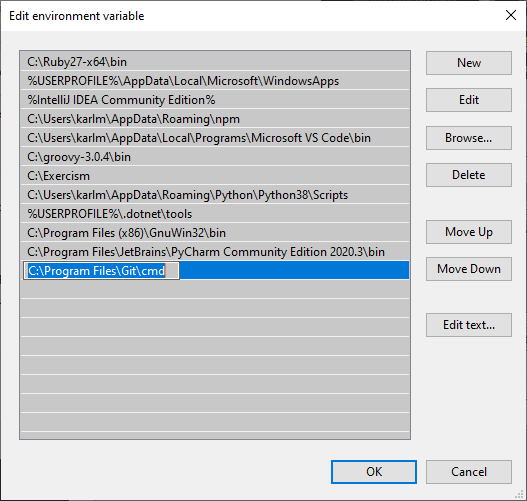
Congratulations, now Git is on the Path. Now you can access it by typing git in the command line from anywhere on the system.
3 - Configure Git by Adding User Name and Email
You will need to configure git by adding a user name and email. It doesn’t have to be a real user name or email. This has nothing to do with your GitHub account.
Once Git is on the path, you can use it from the command line anywhere on your system. You can open the command line quickly in windows by pressing the Windows key and typing cmd.

In the command line, run these two commands:
git config --global user.name "My name"
git config --global user.email "email@email.com"
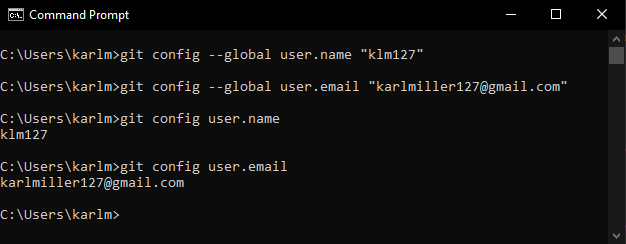
You can see what user property is set by entering, for example, git config user.name.
4 - Fork the Repository on GitHub.
You need copy the repository you want to change from the account or organization that controls it to your own GitHub account first by “Forking” it. Then you will edit your Fork before Pull-requesting changes back into the original repo. You’ll have the option to delete your fork afterwards.
Head over to project ideas repository on GitHub.
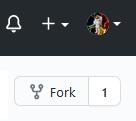
In the top right corner, right under your name, there is a button that’s not obviously a button labeled “Fork”. Click that button.
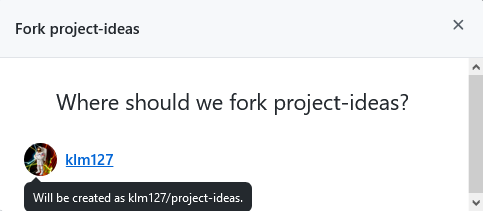
You will be prompted “Where should we fork project-ideas”? Click your own account name.
GitHub will take a moment to process the forking.
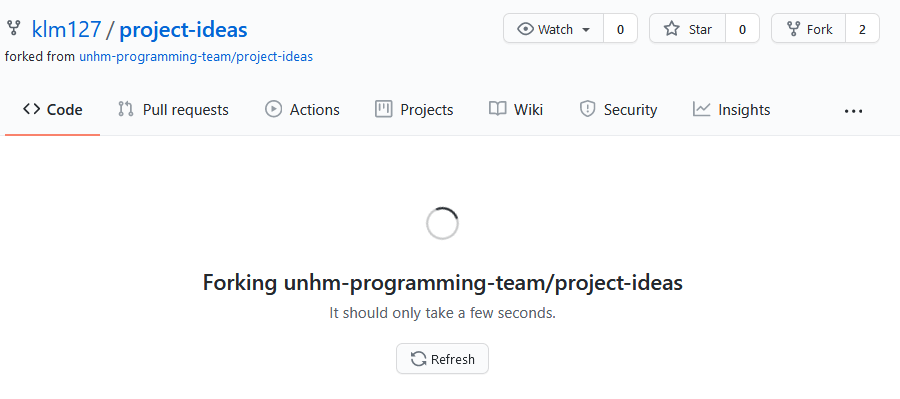
When the forking finishes, you will now have a “fork”, a copy repository identical to unhm-programming-club/project-ideas located at https://github.com/your_github_username/project-ideas
5 - Clone your Fork
In the repository you just created, you will see a big green button labeled Code. Click that button.
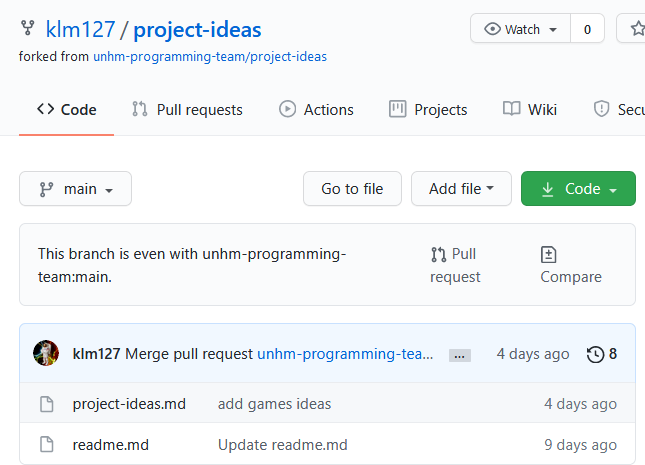
A drop down menu will appear.
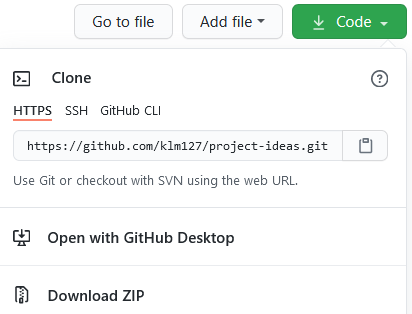
Copy the URL listed there. That’s the remote address of your fork. There is a convenient copy button as well.
This is the URL that we will use to “clone” your fork onto your local system.
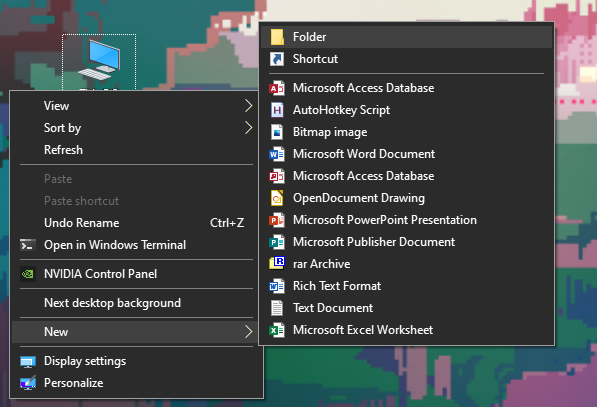
Create a new directory on the Desktop or wherever is clever. You can delete this later, since your changes will be synced to GitHub at the end anyway. It’s likely you already know that a directory can be created by right clicking on the Desktop and selecting new > Folder.
Double click on your folder to open it in Windows Explorer
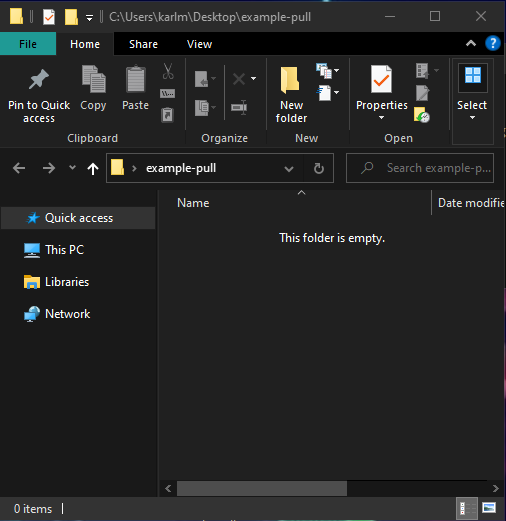
Now click in the address bar.
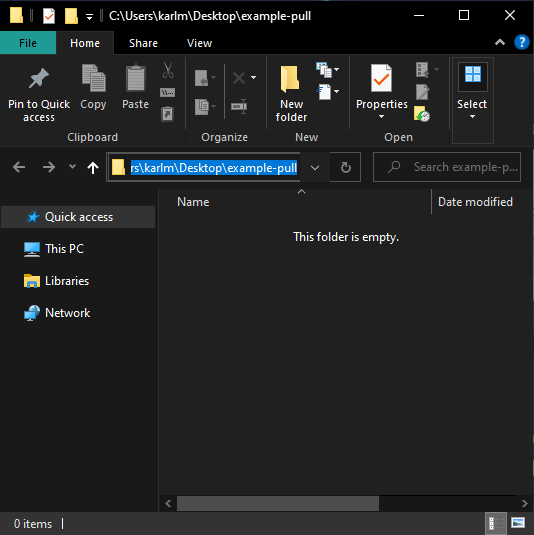
Now type cmd and press Enter
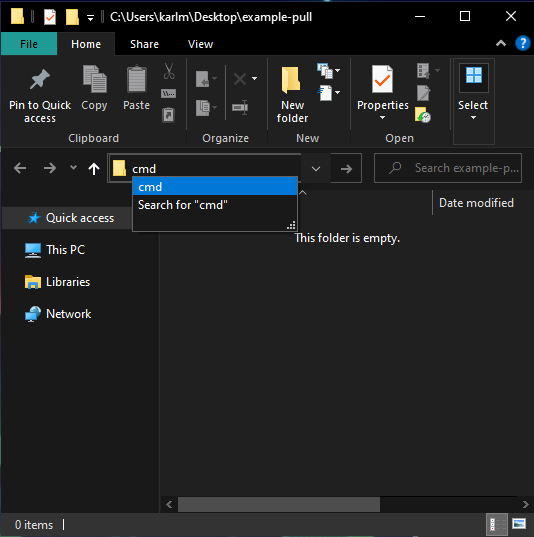
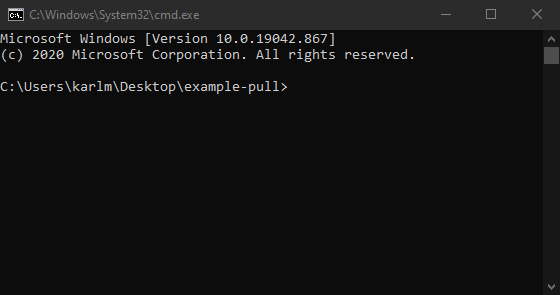
The command prompt will open already set to the directory you created.
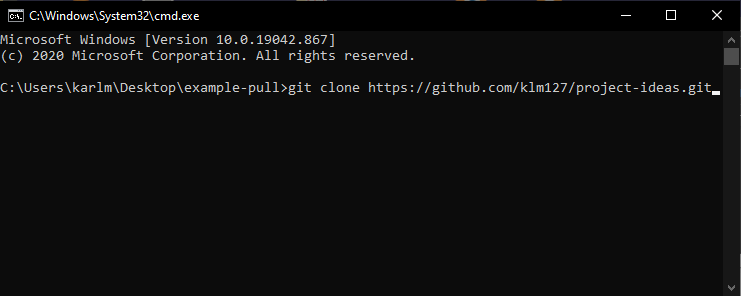
In the command prompt type git clone then press Ctrl+V to paste the git address you copied earlier from Github.com.
You will be rewarded with a message indicating succesful cloning.

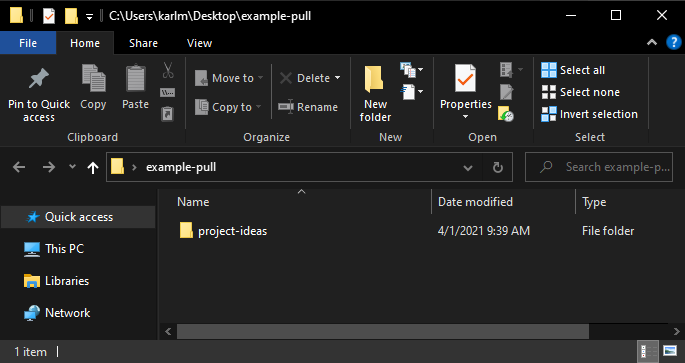
In the directory you created on the desktop, there will be a new subdirectory, a clone of the repository on Github.com.
6 - Make your changes
Next, edit the project-ideas.md file in the directory you just created.
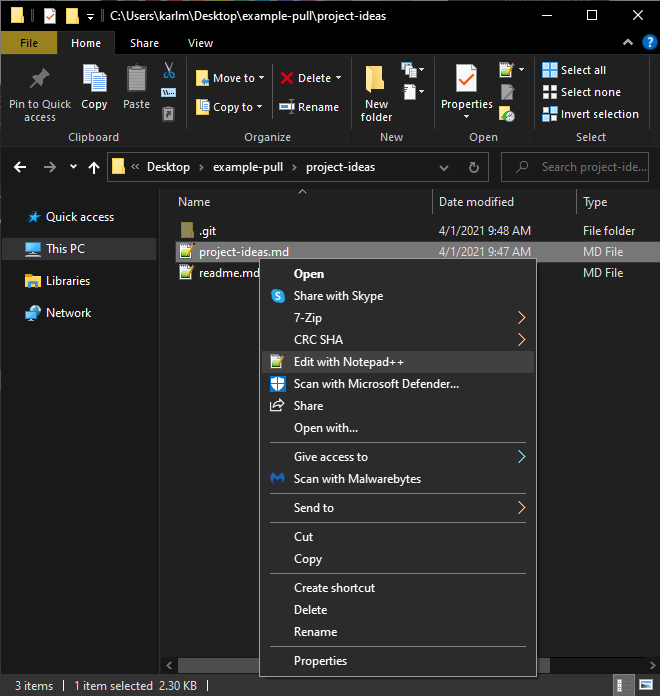
Note: You can use notepad or another text editor if you don’t have Notepad++.
Add a project idea to one of the lists. The file is markdown. You can get an idea of how markdown works here.
If you’re at a loss for an idea, just think of your favorite game, and suggest copying that game. Nobody said the project idea has to be something easy or even feasible! Just anything that interests you.
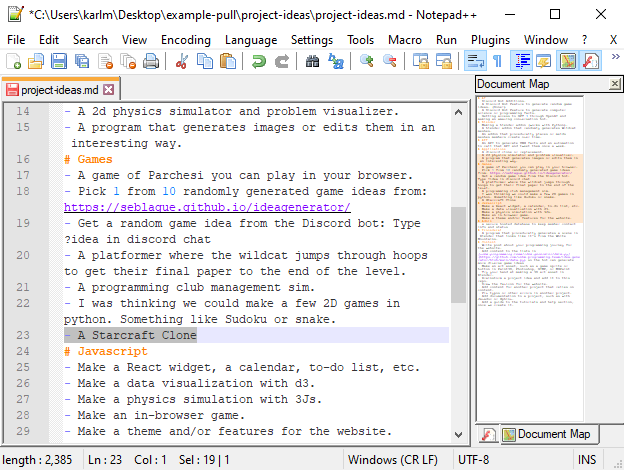
Save the file.
7 - Add the changes to git
Open the command line in the cloned directory.
If you still have the command line open from earlier, you can use the ‘cd’ command to get the command line into the directory. You’ll need to have the command line open in that directory to execute git commands.

If you type git status you will see that there are “untracked changes” now.
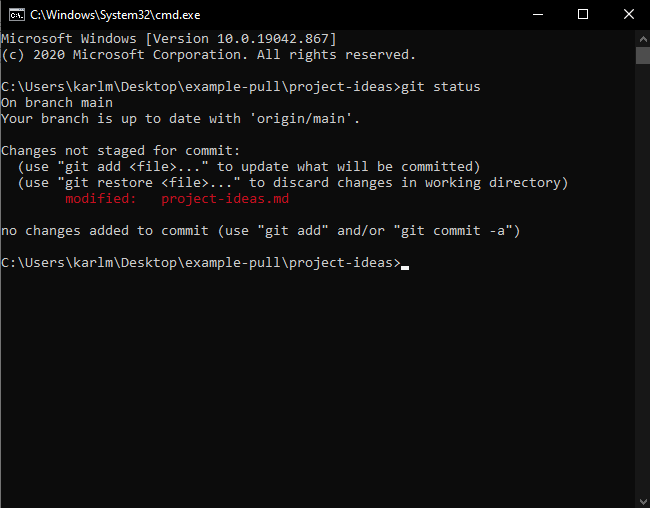
Changes need to be ‘staged’ or ‘added’ before they can be saved or ‘commit’ed.
You can add all the changes with git add *.
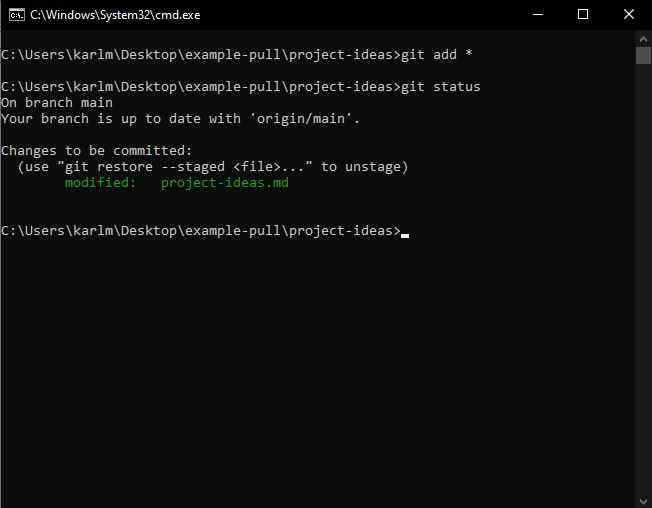
Now your changes are staged / tracked.
8 - Commit the changes
Committing takes a snapshot of the current state of the project. It’s basically a save.
Every commit has to have a short message with it that describes what changes were made.
Committing only “saves” the files that were already staged/tracked with git add.
To commit, type git commit -m "My commit message".

9 - Push the Changes
Now it’s time to send your commit back to the Github fork you created earlier.
In the command line, type git push origin.

If it’s your first time pushing to GitHub, a new window will pop up asking for your GitHub login. Login with this window.
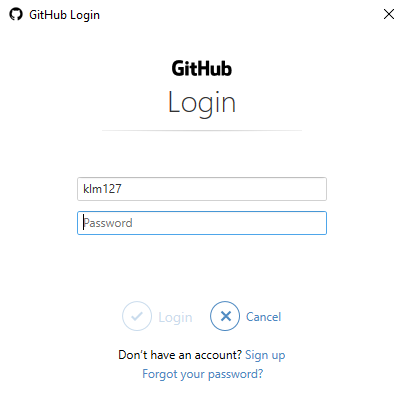
Enter your GitHub credentials. Sometimes, you will be asked again in the command line. Once you enter your GitHub username and password, the commit you made will be “pushed” and will now appear on your Fork on GitHub.com.
10 - Open a Pull Request
Navigate to the original repository at https://github.com/unhm-programming-team/project-ideas.
Click on the Pull Requests tab.
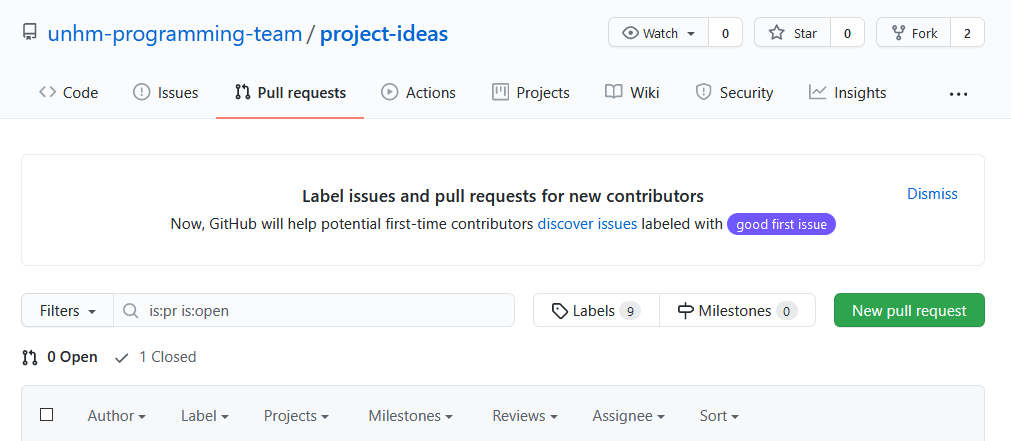
Click the big green button labeled “New Pull Request”.
Normally, you’d have made a branch after you cloned your repository, but this tutorial aims to be as simple as possible. If you had made a branch, Git would automatically ask you about Pull Requests here. Instead, you have to click where it says “compare across forks”.
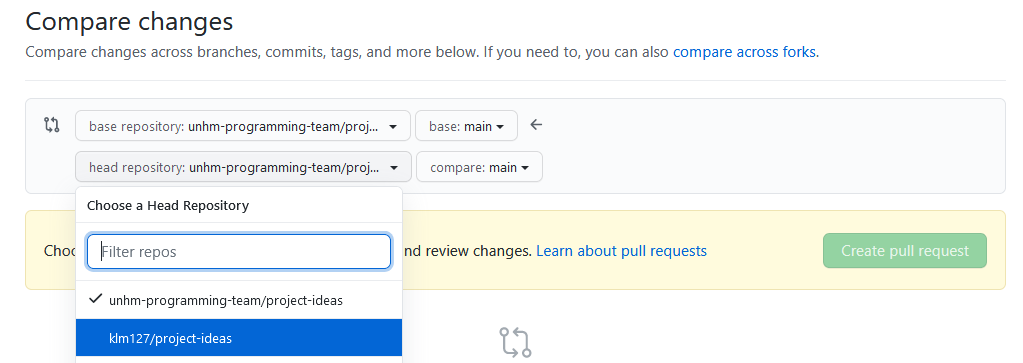
After clicking “compare across forks” you will be asked which repository is the “base” and which is the “head”. The “head” will be the repository you forked and the “base” will be the original repository your changes are now going to be merged in to.
Set your fork to the head of the pull request by clicking the head repository and selecting your fork from the drop down options.
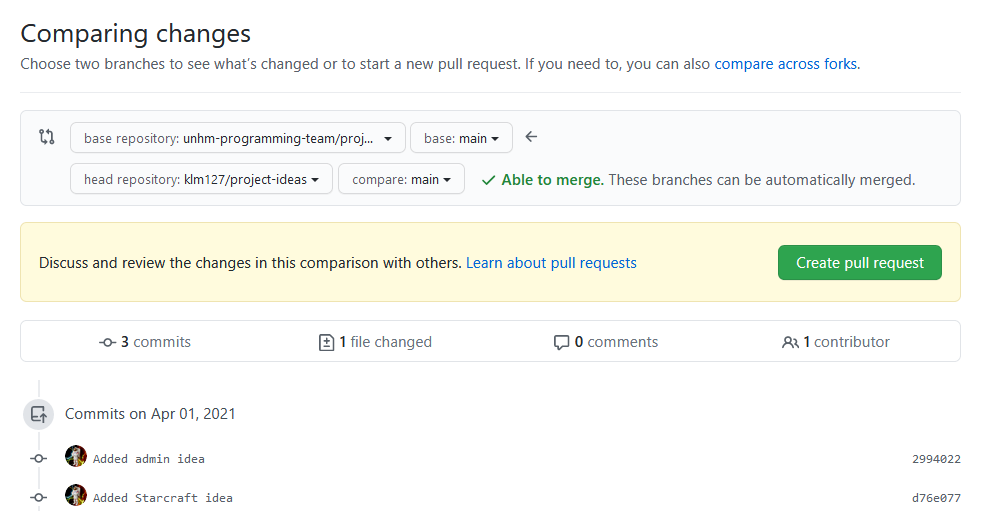
A list of commits you made and the changes those commits caused will be shown. It will be indicated whether the branch can be automatically merged or not (pending approval of the original repository owner).
Click ‘Create pull request’
The next page will ask you to enter a title and comments. You will at least need a title to submit the Pull Request.
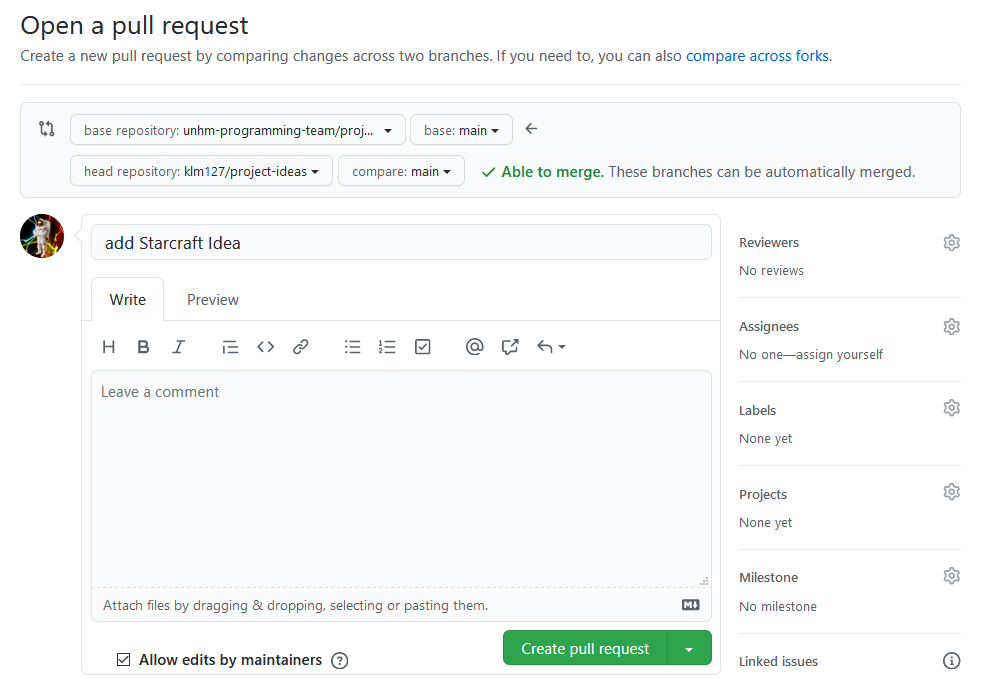
Click Create pull request one last time.
Done!
Congratulations. If you’ve made it this far, you’ve probably managed to make a pull request. Now all you have to do is wait for it to be reviewed and merged into the original repository.
There’s a lot more that can be done with Git, but hopefully this tutorial provides enough of the basics to help a new GitHub user make a pull request.
Most IDEs, like VSCode and Pycharm, integrate Git into the user interface for convenience. There is also a Git GUI that can perform these operations. However, it’s useful to know how to use Git from the command line because when one of those UIs fails or is taking to long to figure out, you will always be able to fall back on the command line.
Please don’t hesitate to contact myself or ask in the Discord help channel for more information. We can screen share and walk you through the process if you get stuck.